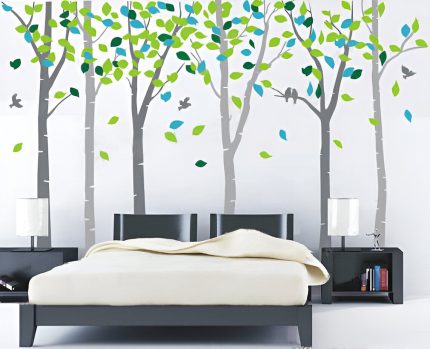
Step-by-Step: How to Apply Wall Decals Without Bubbles
Because wall decals make an excellent option for creating a stylish decor at affordable and renter-friendly rates. If you do have a case and find that frustrating bubbles of air are left over after applying it, well — it can spoil the clean professional finish. This is a step by step guide for how to put wall stickers on without bubbles. These tips are perfect for decorating a nursery, home office or adding that missing flair in your living room every time.

What Cause Bubbles in Wall Decals
Causes of air bubbles during application are :
- The wall isn’t quite smooth or clean
- Too Fast Of An Application With The Decal
- Smoothing is inappropriate with Tracking
- Backing paper stripped too quickly or bumpily
The good news? Preparation, and the right technique can help you completely avoid these pitfalls altogether.
What You’ll Need
Tools Needed: You Will Need These Before you Start
- Your wall decal
- A thin strip of tape like masking or painter’s
- Plastic Squeegee or Credit Card
- A level (optional)
- Clean cloth
- Mild soap and water
- Scissors (for large decals)
How to Get Wall Decals on the Wall Without Bubbles
Step 1: Clean Off the Wall
Start with a clean canvas. Wipe the wall with a damp cloth and mild soap to remove any dust, grease or dirt. Allow it dry well — even the slightest bit of moisture can lead to air bubbles and poor adhesion.
Step 2: Plan Your Placement
Position the Decal on the Wall Attach it temporarily with masking tape. For a bigger piece, check it is level so everything aligns. Think outside the box and verify placement before you kiss it.
Step 3: Make a Hinge With Tape
After you get it positioned where you want, tape the decal across its top edge to create a ‘hinge. That way it holds in place when you apply it and will not move around or mess up.
Step 4: Peel and Stick — And Peeling very VERY Carefully
Turn the decal over and start peeling off the back paper from top to bottom. Only peel back an inch or so. Slowly press the decal onto the wall, using your squeegee or credit card to remove any air bubbles and working from its center towards edges.
Step 5: Smooth as You Go
While pulling the backing paper, use a squeegee and flat even strokes to apply strength as you smooth down decal onto wall. This step is crucial. Carefully pushing air outwards, working up to the edges.
Step 6: Place the Transfer Tape on top of your design and then Remove it
Once the decal is down and fully pressed, slow peel back transfer tape (Clear or Semi-transparent Top Film) from Graphic. Do it slow/steep angle. If part of the decal comes up with the tape, push it back down and run your squeegee over that entire section one more time.
Step 7: Final Touches
Inspect the decal once it is on your wall. If you find small bubbles, then poke it gently with a pin and press the surface using your finger tip. Do not press too hard or scrape, as the design may be damaged.
Perfecting Every Application
- Don’t rush. Patience is the Key to Zero Bubbles
- Avoid textured surfaces. They work best for smooth, flat wall areas.
- Use in Clean And Dry Dust Free. The bumps really come shiny because any small dust particles that get trapped make the acrylic bumpy.
- Do not use on freshly painted walls If you are painting let it dry for 2–3 weeks before doing this step.
- Use heat if necessary. If you do get bubbles that refuse to disappear, using a hair dryer on the vinyl will help relax it and stick Essays better.
Conclusion
You do not have to accept that applying wall decals should be difficult. If you prep and follow the correct method, I swear it goes on smooth without bubbles just like a pro did it. Follow these steps the next time you use wall art to decorate, and watch your space transform perfectly!
FAQs
- Which walls are decals worse to stick?
Wall decals work perfect on any flat, regular painted drywall, glass or mirror tile surfaces. Do Not apply them to textured walls, brick or other porous surfaces with moisture & grease.
- How long should I wait to put decals on my walls after they’re painted?
Allow the paint on your walls to cure for at least 2–3 weeks before you hang anything up. Decal application should not be done too early as it may result in the decal beginning to separately re Cheap Jerseys Wholesale move or peel.
- Do Wall Decals Come Off The Wall? And Can I Stick Them Back On Again!
The adhesive backing on most standard vinyl decals does also not allow them to be reusable- once they have been removed, the decal will never stick in place again. Nevertheless, there are some premium re-usable decals—be sure to read the product notes before purchasing.
- How Can I Get Rid Of The Air Bubbles Afterwards?
Puncture the bubble with a pin or needle and press out the air either by hand or squeegee. Give the vinyl a warm up with a hairdryer to soften it, making sure note to overheat while you smooth out any and areas.
- Do bedroom wall decals ruin paint or walls?
If done correctly, well-made wall murals are peelable and completely safe for your painted walls. Gently peel them off slowly at a sharp angle, and best to do this with some use of heat if you can get the adhesive nice and warm to soften.
Read More: 10 Trending Wall Decal Ideas for Modern Home Decor
